First Foods for Baby: Your Step-by-Step Guide to Solids at 6 Months

Introducing solids to your baby around 6 months is an exciting milestone. This guide provides a comprehensive step-by-step approach to safely and successfully introduce your baby to their first foods, ensuring a healthy and happy transition to solid foods.
Embarking on the journey of introducing solid foods to your little one is both thrilling and a little daunting. Knowing where to start and what to expect can make all the difference. This guide, **First Foods for Baby: A Step-by-Step Guide to Introducing Solids at 6 Months**, will help you navigate this important milestone with confidence, ensuring a healthy and happy experience for both you and your baby.
When to Start: Recognizing Readiness Signs
Knowing when your baby is truly ready for solid foods is crucial. Starting too early can interfere with their digestive system and nutrient absorption. Generally, pediatricians recommend starting around 6 months, but it’s more about observing your baby’s individual developmental cues.
Key Readiness Indicators
Look for these signs that indicate your baby might be ready to try solid foods:
- Good Head Control: Can hold their head steady and upright.
- Sitting Upright: Can sit with minimal support.
- Interest in Food: Shows curiosity and reaches for food when others are eating.
- Tongue-Thrust Reflex: This reflex, which pushes food out of the mouth, has diminished.
- Opening Mouth for Spoon: Will open their mouth when a spoon approaches.
It’s important to remember that every baby develops at their own pace. If you’re unsure, consult with your pediatrician. Premature babies might need to reach a corrected age of 6 months before starting solids.
Starting solids is a gradual process, not a race. It’s about exploration and learning, so be patient and trust your instincts.

First Foods: Purees vs. Baby-Led Weaning
Once you’ve determined that your baby is ready, the next step is choosing the right first foods. Two popular methods are purees and baby-led weaning (BLW). Each approach has its pros and cons, so let’s explore them.
Purees: A Classic Approach
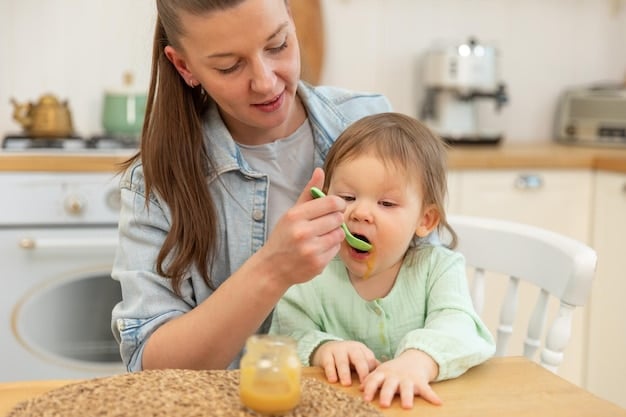
The puree method involves starting with smooth, single-ingredient foods. This allows babies to get used to new flavors and textures gradually.
Baby-Led Weaning (BLW): Letting Baby Lead
BLW involves offering babies soft, appropriately sized pieces of whole foods that they can feed themselves.
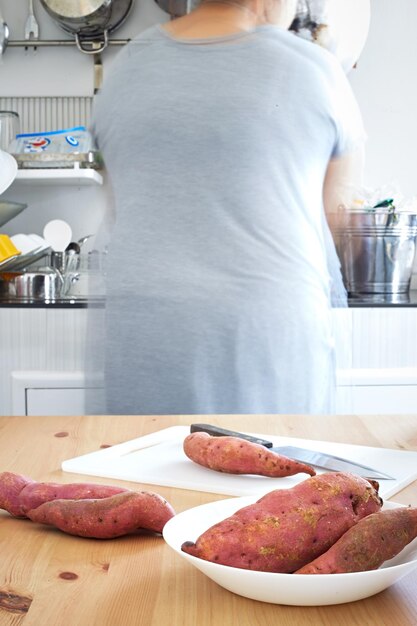
- Popular First Foods for Purees: Avocado, sweet potato, banana, butternut squash, carrots, peas.
- Best Practices for Puree Feeding: Offer small amounts (1-2 teaspoons) after a milk feeding.
- Benefits of BLW: Encourages independence and develops fine motor skills.
- Safety First for BLW: Ensure foods are soft and easy to manage to prevent choking.
Ultimately, the best method is the one that works best for you and your baby. Many parents choose a combination approach, offering both purees and soft finger foods.
Regardless of the approach you choose, always supervise your baby during mealtimes to minimize the risk of choking. Make sure all foods are prepared safely and appropriately for their age and development.
Preparing First Foods: Homemade vs. Store-Bought
Both homemade and store-bought baby food are viable options. The key is to ensure they are nutritious and safe for your baby. Each has its benefits and considerations.
Homemade Baby Food: Fresh and Customizable
Making your own baby food allows you to control the ingredients and consistency.
Store-Bought Baby Food: Convenient and Readily Available
Store-bought options offer convenience and often come in various flavors and stages.
- Homemade Pros: Fresher, more control over ingredients, potentially cost-effective.
- Homemade Cons: Time-consuming, requires planning and preparation.
- Store-Bought Pros: Convenient, readily available, variety of options.
- Store-Bought Cons: Can be more expensive, may contain additives or preservatives.
If you choose to make your own baby food, make sure to wash all produce thoroughly, cook foods until soft, and blend or mash them to a smooth consistency. Store any leftovers in the refrigerator for up to 48 hours or freeze them for longer storage. When buying store-bought baby food, look for options with no added sugar, salt, or artificial ingredients.
Regardless of whether you choose homemade or store-bought, prioritize single-ingredient foods to start with, allowing your baby to adjust to new flavors one at a time.
Step-by-Step: The First Few Weeks
Introducing solid foods is a gradual process. Here’s a suggested timeline for the first few weeks, focusing on introducing one new food at a time to monitor for allergies or sensitivities.
Week 1: Single-Ingredient Purees
Start with a small amount of a single-ingredient puree, such as avocado or sweet potato. Offer 1-2 teaspoons after a milk feeding.
Week 2: Introducing New Flavors
If your baby tolerates the first food well, introduce another single-ingredient puree, like banana or butternut squash.
During this phase, pay attention to your baby’s reaction. Watch for any signs of allergic reactions, such as rash, hives, vomiting, or diarrhea. If you notice any concerning symptoms, stop feeding the new food and consult with your pediatrician. Remember to wait a few days between introducing each new food.

Allergies and Sensitivities: What to Watch For
Food allergies are a concern for many parents. Introducing foods one at a time allows you to monitor for any adverse reactions. While it’s common to worry, most babies tolerate new foods well.
Common Allergens and How to Introduce Them
Previously, parents were advised to delay introducing common allergens. Current guidelines recommend introducing them early, around 6 months, to potentially reduce the risk of allergies.
Recognizing Allergic Reactions
Allergic reactions can range from mild to severe. Knowing what to watch for is essential.
- Symptoms of Mild Allergic Reactions: Rash, hives, itching, mild vomiting or diarrhea.
- Symptoms of Severe Allergic Reactions: Difficulty breathing, swelling of the face or tongue, wheezing, loss of consciousness.
- EpiPen: If your baby has a known allergy, always carry an EpiPen and know how to use it.
- Consult Your Pediatrician: If you suspect an allergic reaction, seek medical attention immediately.
It’s also important to differentiate between allergic reactions and food sensitivities. Sensitivities may cause milder symptoms like gas or fussiness but don’t involve the immune system.
When introducing potential allergens, offer a small amount initially and watch closely for any reactions. If all goes well, gradually increase the portion size over the next few days.
Beyond Purees: Progressing to Textures and Finger Foods
Once your baby is comfortable with a variety of single-ingredient purees, you can start introducing more complex textures and eventually transition to finger foods. This is an exciting step toward developing their eating skills.
Introducing Textures
Start by thickening purees with mashed foods or gradually reducing the blending time. This helps babies get used to lumpier textures.
Finger Foods
Finger foods are soft, bite-sized pieces of food that babies can pick up and eat themselves.
- Safe Finger Foods: Soft-cooked vegetables (carrots, broccoli), fruits (banana, avocado), well-cooked pasta, and scrambled eggs.
- Foods to Avoid: Hard, small, or sticky foods that pose a choking hazard (whole grapes, nuts, popcorn, hot dogs).
- Offer a Variety: Introduce a range of flavors and textures to encourage adventurous eating.
- Supervise Mealtimes: Always supervise your baby during mealtimes to prevent choking.
Remember to cut foods into small, manageable pieces that are easy for your baby to handle. Patience is key as your baby learns to self-feed. Messes are part of the process!
As your baby progresses, continue to offer a balanced diet that includes a variety of fruits, vegetables, grains, and proteins. Consult with your pediatrician or a registered dietitian for guidance on meeting your baby’s nutritional needs as they grow.
| Key Point | Brief Description |
|---|---|
| 👶 Readiness Signs | Look for head control, sitting ability, and interest in food at around 6 months. |
| 🍎 First Foods | Start with single-ingredient purees like avocado, sweet potato, or banana. |
| ⚠️ Allergies | Introduce new foods one at a time, watching for any allergic reactions. |
| 🍽️ Textures | Gradually introduce textures and finger foods once your baby is comfortable with purees. |
Frequently Asked Questions
▼
Look for key readiness signs like good head control, the ability to sit upright with support, showing interest in food, and the diminished tongue-thrust reflex. These signs typically appear around 6 months of age.
▼
Good options include single-ingredient purees such as avocado, banana, sweet potato, and butternut squash. These are easy to digest and offer essential nutrients. Introduce one at a time to monitor for allergies.
▼
Start with small amounts, about 1-2 teaspoons, after a milk feeding. Observe your baby’s cues; if they seem interested, you can offer a bit more. The goal is to introduce them gradually, not to replace milk feedings.
▼
Introduce potential allergens early, around 6 months, one at a time. Start with a small amount and watch for any reactions. If there are no issues, gradually increase the amount over a few days.
▼
Don’t force it. It’s normal for babies to refuse food sometimes. Try again another day, offering the same food or a different one. It’s all about exploration and learning at their pace.
Conclusion
Introducing solid foods to your baby is a significant and exciting milestone. By following a step-by-step approach, understanding your baby’s cues, and prioritizing safety, you can ensure a positive experience for both you and your little one. Remember to be patient, offer a variety of healthy foods, and enjoy this special time as your baby discovers new flavors and textures.


